Dressed and Weaving
I know I said beaming a sectional warp is fast; however this is relative to the length of the warp, as well as the weaving width.
What I should have said is beaming a 35-yard sectionally is much faster than winding on a 35-yard onto a plain beam.
Prior to this warp, the longest warp I had beamed was 30 yards. That is the one presently on Meg, the 24” Macomber.
The longest plain warp I have beamed is 16-yards. That one took hours and hours! I would not attempt to plain beam more than that.
I routinely plain beam 10 to 12-yards.
In fact, I have a 12-yard, hand dyed warp waiting to be loaded onto the Beast, the 56” Macomber. It’s 40” wide and divided into five 8-inch chains.
However, that warp is for another day.
For the current project, I discussed preparing a project and preparing a sectional warp.
Once I loaded the warp onto all the sections, I was so pleased with my math, as I had not overloaded the spools or loaded too much/too little into each section.
I actually moved the yardage meter from my electric winder to the tension box. I bought a second hand tension box with an ancient meter, which measures in meters and not yards, but it is not accurate at all. The new one that came with my winder measured in yards and works beautifully. I have decided to invest in a second yardage meter to leave on the tension box.
With the meter, I was able to calculate that 47 rotations on the warp beam was equal to 35 yards of 11/2 cottolin with a sett of 24.
Due to the length of the warp, it took an hour and a half to fully load the beam.
That is a lot of thread!
Over 19,900 yards!
I was pleased to see I have a lot more room on my section pegs. One of these days, I am going to load 50 yards onto one of these Macombers!
I was even more pleased to see my calculations resulted in minimal waste.
I needed 480 yards on most of these spools. I added 2-3 yards per spools as insurance. This is what I had left. Those extra yards covered the distance between the spool rack and the tension box on the loom and down to the beam. There was very little left on the spools. Yay!
From there, I taped my section ends onto a yard stick and pulled enough off to be threaded through the heddles, sleyed through the reed, and tied onto the cloth apron.
I counted out the heddles I needed for the right side of my project and began threading right to left.
Threading the heddles is actually my favorite part of dressing the loom. It is easy for me to memorize threading patterns, and after a repeat or three, I kind of switch to automatic mode allowing my mind to wander. I find it relaxing.
I have a system that ensures I am able to catch mistakes quickly and well before I get to the end.
For this project, my pattern repeat is 42 threads. These are the heddle counts for each repeat:
Shaft 8: 4
Shaft 7: 6
Shaft 6: 6
Shaft 5: 5
Shaft 4: 5
Shaft 3: 6
Shaft 2: 6
Shaft 1: 4
Those numbers total 42. Before I thread each repeat, I move the appropriate number of heddles on each shaft to the right. I pull a bundle of warp threads from the back and hold them between the heddles I have pulled for this repeat and the rest of my heddles on the left.
This way, I have isolated the 42 heddles I need from the ones I have already threaded on the far right and the ones to be threaded on the far left. Remember, I thread right to left.
If I run out of heddles on a specific shaft before I have finished a repeat, I can check what I have done. If I made a mistake, I have no more than 42 threads to contend with, rather than the 569 of the entire warp.
Since I began doing it this way, I rarely, if ever have a threading error.
It took me another hour and forty minutes or so to thread those 569 ends.
As my Macombers have a beater that is completely removable and a front beam which opens all the way to the floor, it is easy and comfortable to sit in the loom at eye level with the heddles. Out of all the different kinds of looms I have dressed, Macombers are the easiest and the gentlest on the body. They are a joy no matter the size of the loom!
While the beater is removed and the breast beam is on the floor, as soon as the heddles are threaded, I change my tie ups. Those can be done after the warp is lashed on and even after fabric is wrapped onto the cloth beam, it is just easier and more comfortable to do it without the beater and beam in the way.
Once the tie ups were done, I spent half an hour sleying the reed. After sitting to thread heddles and sitting on the floor to address the tie ups, I actually stand to sley the reed. Macombers are taller than most looms. I just find it quick and easy to sley them while standing.
At this point, I took a break for the evening, at least as far as dressing the loom.
Earlier in the day, I wound about 500 yards of 8/2 cotton into a hank for dyeing. I thought I would try my hand at dyeing weft.
I used some of the same colors from the big dyeing project above. I did a dry dye application with Jade Green, Fuchsia Red, and Deep Yellow, followed by bottle dye in Truffle Brown.
After I sleyed the reed, I rinsed the dye from the hank in hopes it would be dry and ready to use once I lashed on the following morning.
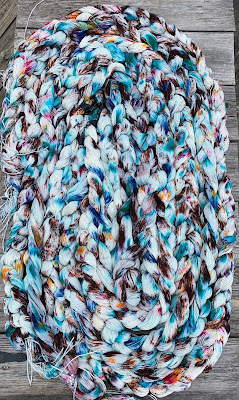
Here’s the hank before I would it into a cake.
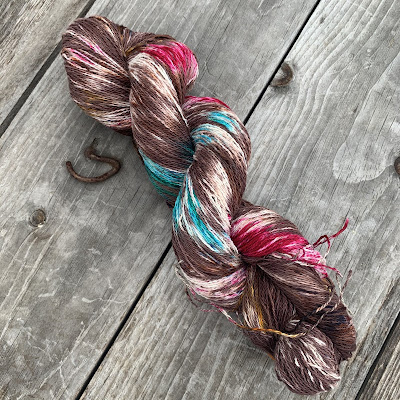
The cake, of course.
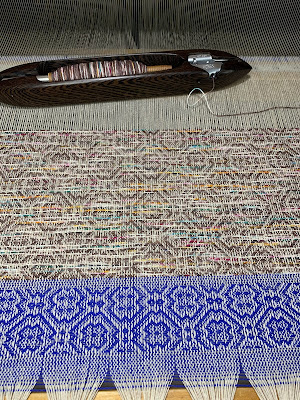
In short order, I lashed the warp onto the cloth apron, used a left over spool with bright blue to close my gaps and test my threading, and I was weaving away!
Now, I am crystal clear on the pattern showing up much better with the solid weft; however, this is a 35-yard warp. One can have only so many tea towels with solid colored weft.
The dyed weft makes me happy, and I think it almost looks like tapestry.
I am beyond thrilled!


Comments