Hong Kong Seams

To be perfectly honest, I had never, ever, in my entire life, heard of Hong Kong seams before a couple of weeks ago.
French seams, yes, but not Hong Kong.
In fact, once upon a time, I had envisioned using a French seam for a cowl I had woven with wool, but the fabric was far too thick to work.
I follow Thief and Moth on Instagram. Their textiles and finished garments are exquisite.
One afternoon, I was admiring the Sapphire Tee and trying to figure out what threads and sett would give me a similar fabric because I could not imagine the circumstances under which I would feel justified in ordering a $290 tee shirt.
This in no way denigrates the product or the seller. I would LOVE to be able to afford to buy one in a different color for every day of the week.
As I was poking around the website, I noticed they had a page entitled "Guide for Sewing with Handwoven Fabrics." The last paragraph deals with Finish Edges. The middle sentence reads: "The top recommendations I give are to either use a serger to finish, or use a bias tape to create a Hong Kong finish."
I immediately searched "Hong Kong finish," and voila, I was sold.
It took me all of two minutes to dig out a few yards of fabric that I had tucked away to make cowls and fingerless mittens.
I read through a couple of tutorials, here and here, as well as watched one or two YouTube videos.
I was ready to go, except I did not have any bias tape. While I know how to make bias tape, I did not want to do that again. So, I ordered a few packages and waited.
As soon as they arrived, I pressed one of the four pieces of fabric I had and gave it a go; however, I did do things a little differently from the tutorials and the videos.
My fabric was basically all 23-inches wide, but they varied in length. Two were 33-inches long, one was 47-inches, and the gold was 50-inches. I only needed one seam. As such, I did not sew the seam before applying the bias tape.
I decided to make life easier for myself and apply the bias tape before I sewed the seam.
This is how my mind works. While I was waiting for the bias tape to arrive, I played a movie in my head of each of the steps to ensure I had committed to memory how to do it. This is what happens with most things. It is almost unconscious.
This is when it occurred to me to apply the bias tape before seaming the edges.
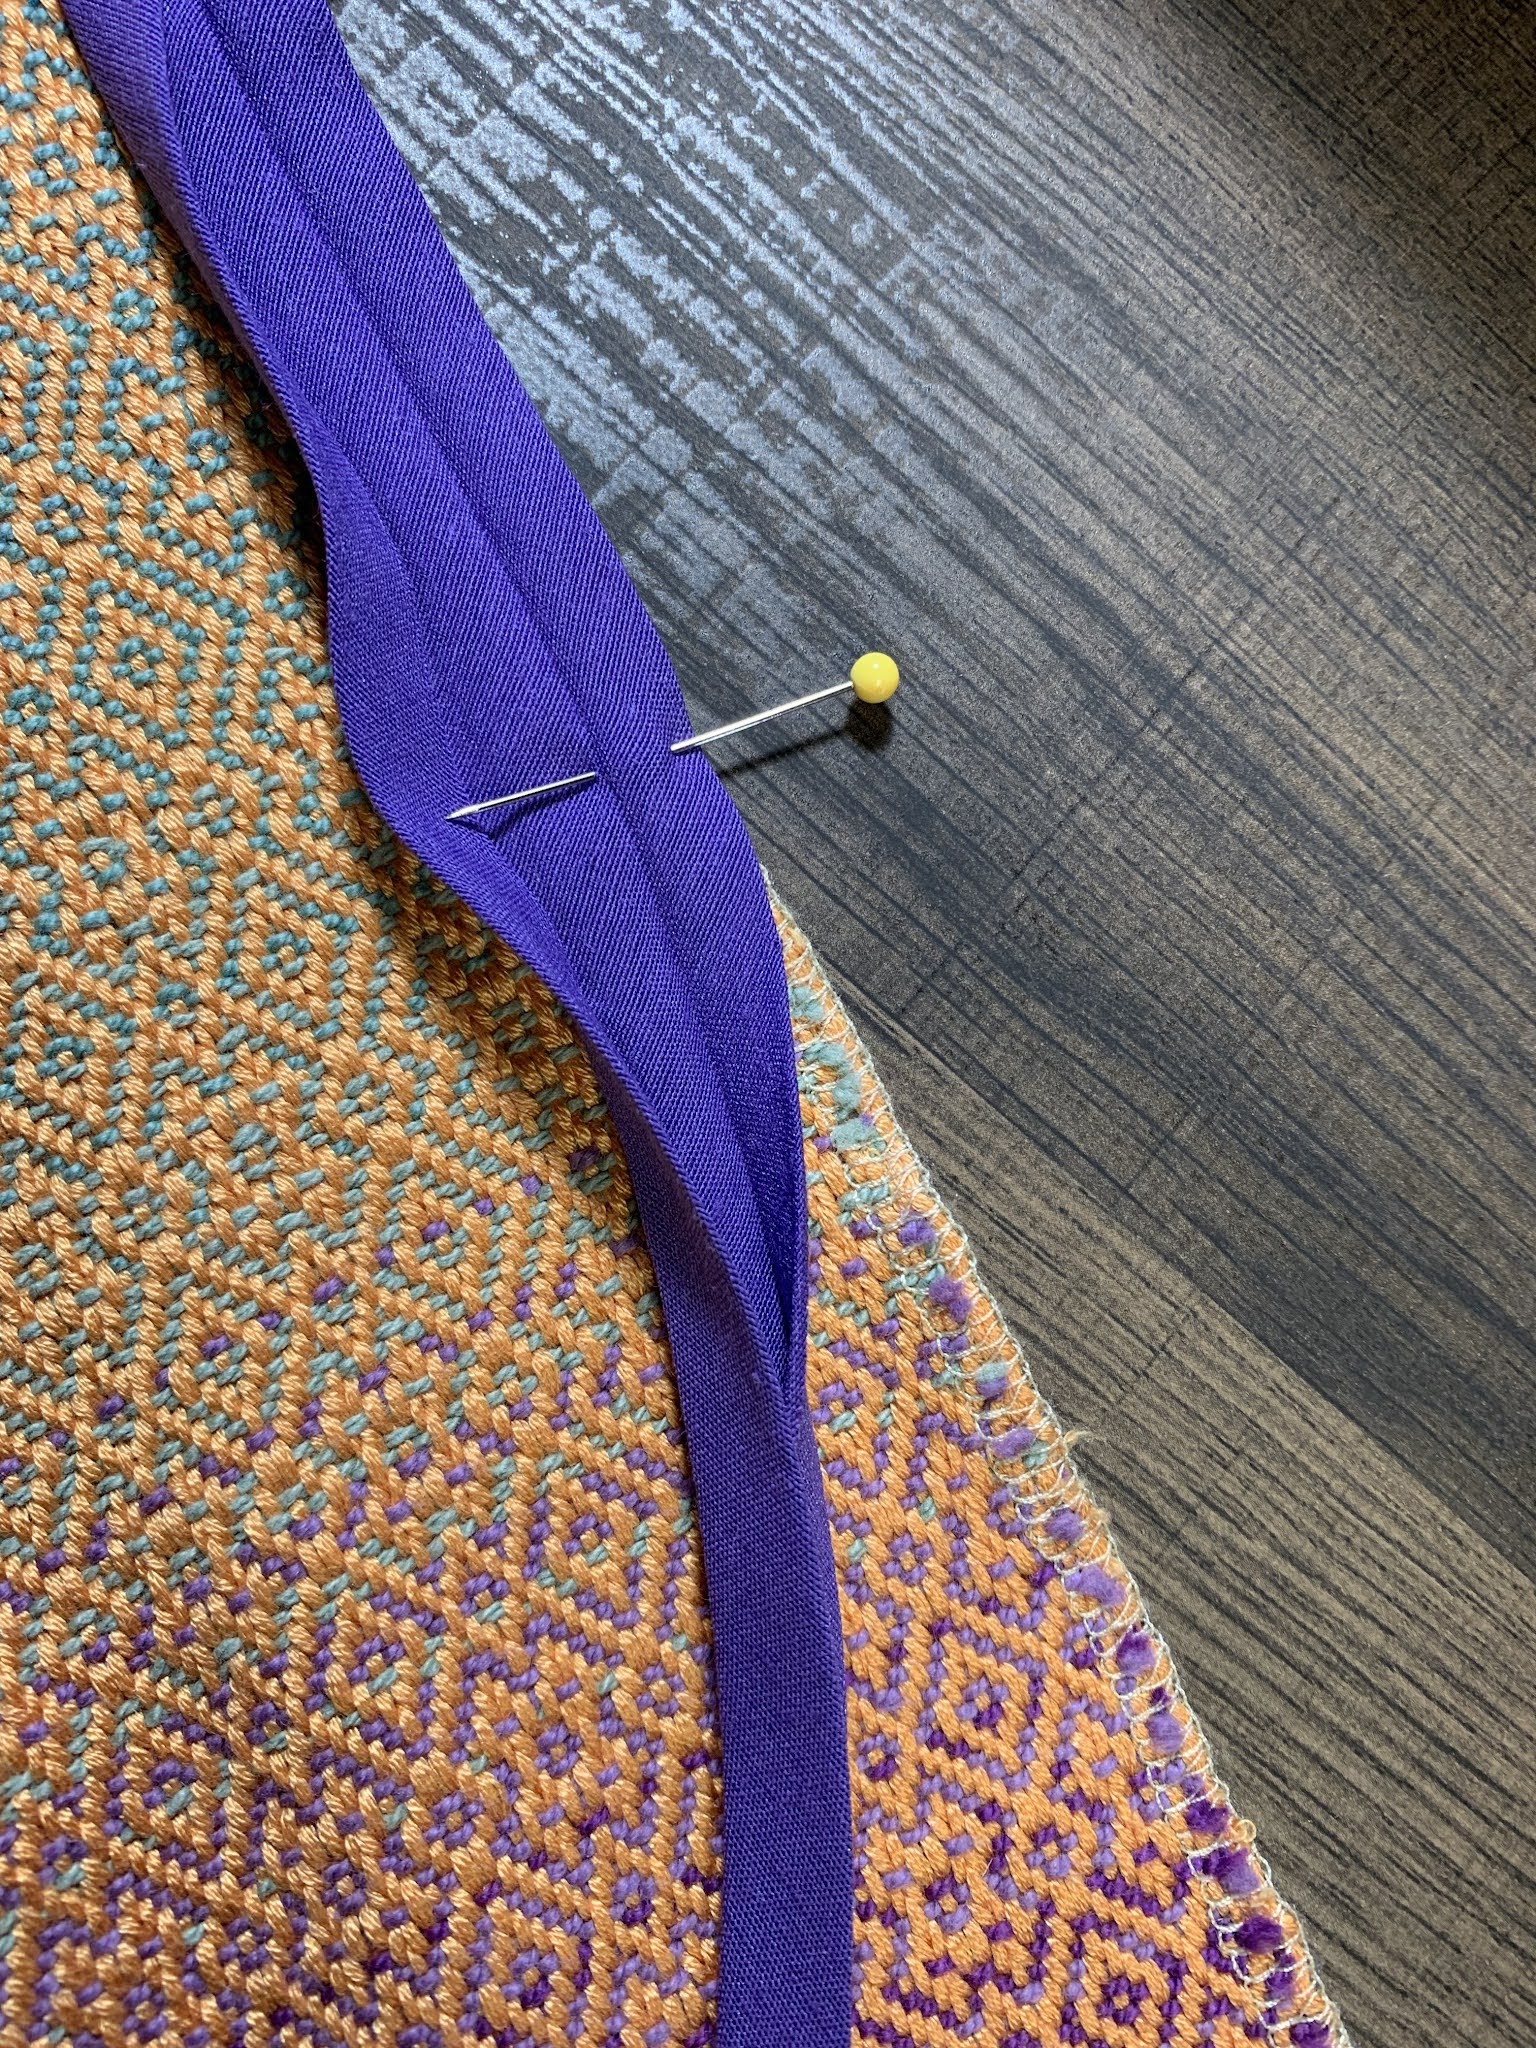
This was also when I became concerned about the raw edge of the fabric and the bias tape showing at each end of the seam. To avoid this, I actually cut the bias tape at least a half an inch longer at each end. My plan was to open the tape up and fold it over onto itself.
The first thing I did was select what I wanted to be the right side of the fabric. I then pinned the short side of the bias tape to the edge of the fabric.


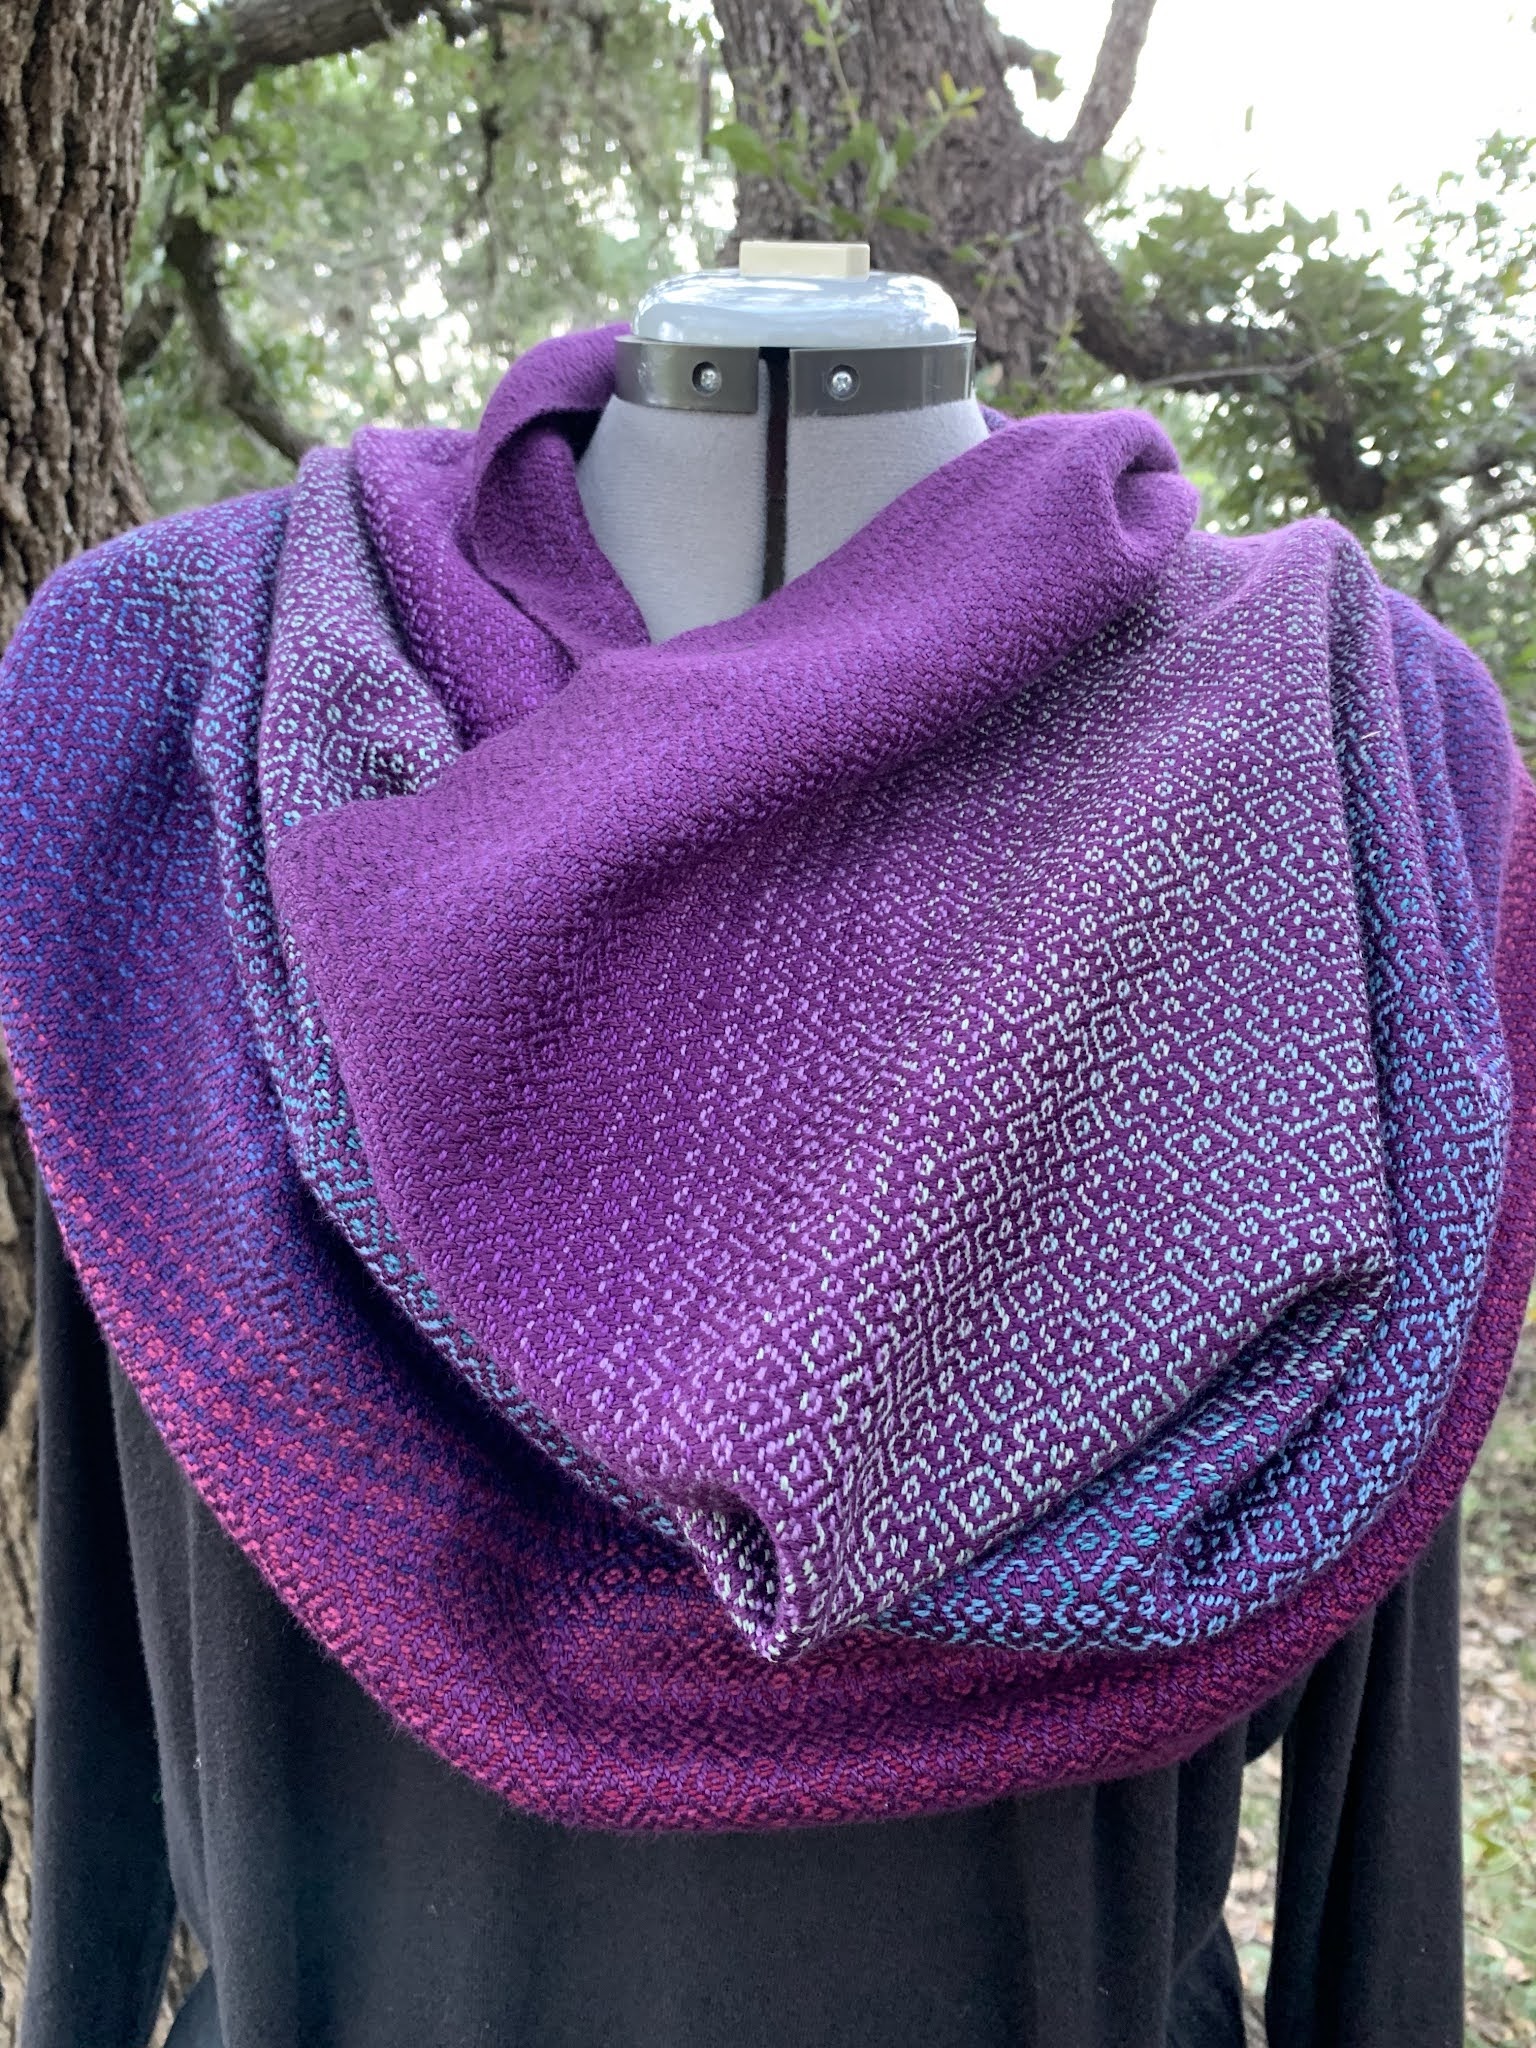
I wove this fabric in 2018 with 8/2 cotton as warp with a sett of 20. The weft comprised various weights of cotton (5/2 and 8/2), as well as 5/2 bamboo. The fabric is supple and dense with the bamboo giving it a soft hand with tons of drape. I have to admit, the bamboo feels luxurious.
Once the fabric came off the loom, I serged the edges and separated them before washing.
Here are the other three:


This one and the one below it were the smallest at 33-inches wide. Both of these used 5/2 cotton. The one below shows where I changed weft colors while weaving. I left it as it. I thought it added interest.


This last one is my absolute favorite. It uses the bamboo for weft. The fabric was 47-inches long before seaming. While there are weaving flubs here and there (which means I get to keep it for myself, it is far too imperfect to share), the weight, feel, and drape of the fabric is outstanding! Plus, the colors!

The shorter versions at 33-inches are practical and cute; however, the 5/2 cotton makes too thick a fabric to wear so close and snug comfortably for me.
For the warp currently on the loom, I think I will use 8/2 cotton for the shorter versions and stick with the bamboo for both the long and short versions. I have no idea how durable the bamboo is, but I am definitely sold on the fabric. I think the cotton warp with the bamboo weft is perfect!
I also have some lace and fingering weight wool I will try as weft, as well.
In addition to the cowls, I used some of it to make fingerless mittens. While I do honestly have a pair of mittens, I have only one porcelain hand model.


These were actually a job to sew. I made the pattern myself by downloading from Pinterest generic mitten patterns. Tracing one of those, I omitted the fingers and added length up the arm. My thought was these might be the thing for a drafty office where hands and fingers were cold but a jacket was far too bulky to wear all day.
I lined them with cotton flannel for comfort and to hide the raw, overlocked edges.
The thumb was the worst of it. The hole was too small to use the sewing machine to top stitch, so I did that by hand.
In the future, should I attempt these again, I am afraid I will have to omit the thumb cover and replace it with a slit opening.
Overall, I am delighted with them; however, I have not made any more...
With 25.5 yards of this same type of fabric on Evangeline currently, I anticipate having more fabric to play with soon!


Comments